Upload Data Files
Setup Instructions
-
Install a file transfer client, WinSCP https://winscp.net/eng/download.php
-
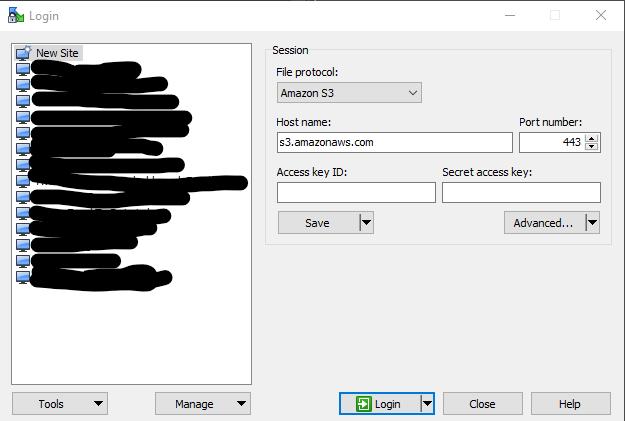
Open WinSCP and click the New Session tab to open a connection popup screen.
 It should have a popup screen like this screenshot below:
-
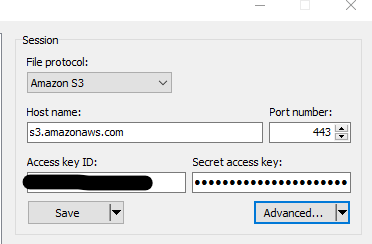
From the connection popup screen. Select the New Site option and select Amazon S3 as file protocol. The access key ID and secret access key will be sent in a separate email.
-
Then click “Advanced…” button. In the Environment/Directories section set option like this:
- Unticked Remember last used directory, Cache visited remote directories, Cache directory changes
- Remote directory: see the email that provides access key and secret key.
-
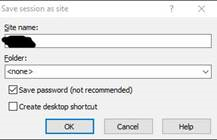
Then click the save button to save the connection settings for future use.
 Note: If you didn’t select save password option, you will have to put in the secret key every time you connect.
-
Then select the saved connection that recently created and click login button to connect.
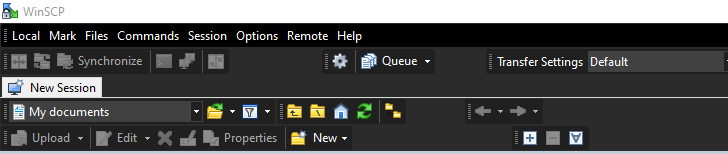
 You should be able to see the screen similar to this (the left side is path on your machine, the right side is path on the secure site). You can drag and drop file from the left side or from the Windows explorer into the right side directly. When finished, close the tab to close the connection.